We all wanted to move without feeling any pain so we could perform things at the utmost level. However, with the tightness of our hips, we ache even at the simplest movements like getting out of bed, standing up from office chairs, or getting out of car seats. Sometimes, we also experience pain in our ankles, knees, and lower backs, which really is a hassle. Hence, in this article, we will tackle 10 Basic Yoga Poses to loosen our hips for flexibility and mobility purposes.
Curious about whether you have tight hips?
Perform a straightforward test: Stand up and glance down at your feet. If your toes veer outward instead of aligning straight ahead, it’s likely that your hip muscles are overstrained and could benefit from stretching.
The positive news is that you can practice a variety of uncomplicated yoga poses at home, focusing on each of the four main directions of hip movement. These poses offer adjustments suitable for various levels of expertise. Aim to incorporate some of these rejuvenating stretches into your routine three or four times a week, and you may experience significant improvements in the flexibility and comfort of your hips.
Benefits of Stretching and the Basic Yoga Poses:
Stretching daily offers well-known advantages—elongating muscles enhances flexibility and might alleviate various discomforts. For individuals grappling with hip discomfort or experiencing tightness in the hips, integrating hip-opening stretches into their routine could yield significant improvements.
Here are some tips to keep in mind before starting your stretches:
- Begin with dynamic stretches. It’s essential to warm up your body with dynamic stretches before exercising. These stretches gently extend the range of movement and prepare your body for more intense activity.
- Listen to your body. When stretching, aim to feel a gentle pull or “ooh” rather than pain or “ow.” Avoid pushing your body too hard into a stretch. Instead, find the point where you feel a slight resistance, known as the Golgi Tendon Organ Response, which signals potential injury. Stay at this point for a few breaths to enable your muscles to unwind and intensify the stretch gradually.
- Focus on breathing. Pay attention to your breathing during each stretch. Deep, comfortable breathing through the nose helps relax your body and allows for a more effective stretch. If you find yourself breathing heavily through the mouth, you may be pushing too hard.
Just a half-minute daily of these basic yoga poses can enhance your flexibility. By following these tips, you can prepare your body effectively for hip-opening stretches, improving your mobility and flexibility.
Butterfly Stretch
Target: Inner thighs
Level: Gentle
The Butterfly stretch is a seated hip opener suitable for all fitness levels:
- Start by sitting on the floor with your spine straight and elongated.
- Flex both knees and join the soles of your feet, letting your knees softly drift outward.
- You have the option to either maintain your hands clasped around your feet or elongate them forward as you pivot at your hips and lower your torso over your legs.
- As your hip flexibility improves, you can extend your hands toward the front of the room.
- Maintain this posture for approximately 30 seconds, concentrating on muscle relaxation and deep breathing.
Malasana/Yogi Squat
Target: Inner thighs
Level: Moderate
Here’s how to perform the wide-legged squat stretch:
- Stand with your feet positioned slightly broader than the width of your hips, turning your toes out at about a 45-degree angle while bringing your heels closer together.
- Bring your hands together at your chest and squat down, allowing your elbows to press against the insides of your inner knees.
- Use your elbows to gently press against your knees, lengthening your spine and maintaining an upright posture.
- You may gently sway from side to side or remain still, depending on what feels comfortable.
- If you find this stretch intense, you can place a block or folded towel beneath your sacrum to provide support.
- Hold the position for approximately 30 seconds, and concentrate on practicing deep breaths and easing into the stretch.
Happy Baby Pose
Target: Inner thighs and lower back
Level: Gentle
Here’s how to perform the happy baby pose, which helps open the hips’ inner thighs and release tension in the lower back:
- Lie down on your back on a yoga mat or comfortable surface to start the workout. Inhale deeply as you pull your knees towards your chest.
- Hook your elbows inside your inner knees and reach your hands to the outsides of both feet. If reaching the feet is challenging, you can place your hands on the back of your knees for support.
- Guide your knees to the outside of your ribcage, bringing the soles of your feet up towards the ceiling.
- On the exhale, gently draw your knees broader and closer to the ground, feeling a gentle stretch in your hips and inner thighs.
- Take deep breaths as you hold the pose, and consider gently swaying your knees from side to side to massage the lower back.
- Hold the happy baby pose for at least 30 seconds, allowing your body to relax and sink deeper into the stretch with each breath.

Reclined Bound Angle Pose
Target: Inner thighs
Level: Moderate
Here’s how to perform the reclined bound angle pose:
- Lie down on your yoga mat with your knees bent and the soles of your feet resting flat on the floor.
- Position the soles of your feet together, letting your knees softly drop outward.
- Place one hand on your heart and the other hand on your belly to connect with your breath and body.
- Close your eyes and take a deep, slow breath, experiencing the gentle stretch in your hips and inner thighs.
- Hold this pose for at least 30 seconds, letting your body relax and releasing tension.
- If you find this stretch too intense on your inner thighs, you can place two blocks or rolled-up towels underneath your knees to provide support and bring the ground closer to you.
Frog Pose
Target: Inner thighs, lower back, abdominals
Level: Intense
To engage in the Frog pose for a deeper inner-thigh stretch, follow these steps:
- Begin on all fours, with your palms firmly planted on the floor and your knees positioned on a blanket or a mat for added support and comfort.
- Gradually widen your knees apart until you feel a gentle stretch in your inner thighs, ensuring that the inner part of each calf and foot remains in contact with the floor.
- Maintain alignment by keeping your ankles in line with your knees throughout the pose.
- Lower yourself down onto your forearms, allowing your body to settle into the stretch.
- Hold this position for a minimum of 30 seconds, allowing your muscles to relax and lengthen.
- If you find the stretch too intense, you can modify it by performing it one leg at a time to adjust the intensity.
Supine Figure Four
Target: Outer thighs
Level: Gentle
To perform the lying figure-four stretch, follow these steps:
- Bend your knees while lying on your back and your feet resting flat on the floor.
- Cross your left ankle just below your right knee, forming a “four” shape with your left leg.
- Stay in this position, or for a deeper stretch, thread your left arm through the space created by your left leg and clasp your hands behind your right knee.
- Lift your right foot off the floor and softly bring your right knee towards your chest while flexing your left foot.
- Maintain the stretch for 30 seconds, feeling the tension release in your hip and glute muscles.
- Repeat the stretch on the opposite side to balance both sides of the body.
Half Pigeon
Target: Outer thighs
Level: Moderate
- Take a seat on the floor with your knees bent and your shins stacked, placing your right leg on top to start the workout.
- Use your hands to guide your right ankle onto your left knee. Your right knee may point upward if your hips are tight, but aim to have it resting on your left thigh as your hips become more flexible.
- Ensure your hips are facing forward, then gently lean forward from your hips, walking your hands slightly in front of you.
- You can remain in this position for a stretch, or if you want a deeper stretch, fold your torso over your thighs.
- For a minimum of 30 sec. Maintain the stretch, then switch to the opposite side to balance the stretch.
Low Lunge
Target: Hip flexors
Level: Gentle
- Begin by positioning yourself in a lunge stance, with your right leg forward and your knee aligned over your ankle.
- Stretch your left leg straight back, with your back toes untucked and your knee touching the ground.
- Gently lift your upper body, placing your hands lightly on your right thigh.
- Shift your hips slightly forward while ensuring your right knee remains behind your toes, allowing you to feel the stretch in your left hip flexor.
- You can maintain this position or, for a deeper stretch, raise your arms overhead with your biceps close to your ears.
- For at least 30 sec. Hold the stretch, then switch sides to repeat the stretch on the opposite leg.
Crescent Lunge
Target: Hip flexors
Level: Moderate
The crescent lunge offers excellent benefits for elongating hip flexors and calves, opening the chest, and stretching the shoulders, back, and abdominal wall, according to Cope.
- Commence by assuming a long, low lunge position.
- Extend your back leg until the back heel cannot touch the floor.
- Elevate your hands upwards while gently sliding the shoulder blades down and away from the ears.
- For a deeper stretch across the chest, bend your arms so that your elbows are parallel to the floor.
- Maintain this position for at least 30 seconds before switching sides to repeat the stretch on the opposite leg.

Camel Pose
Target: Hip flexors
Difficulty: High
For individuals with sensitive knees, consider using two yoga mats for extra cushioning.
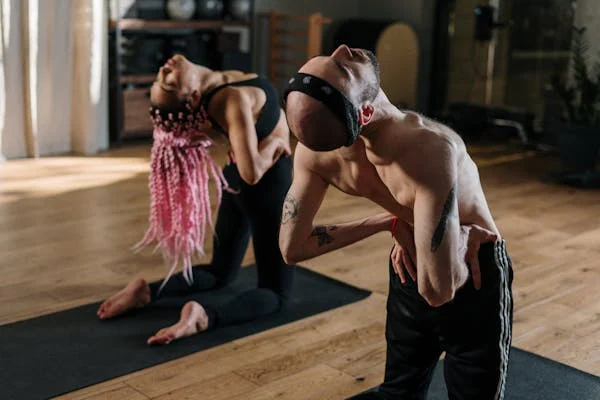
- Start by kneeling on your mat with your knees hip-width apart and your hips aligned directly over your knees.
- Ensure your shins and the tops of your feet are securely pressed against the mat. Transition to an upright position and place your hands on your lower back with your fingers pointing toward your hips.
- Inhale profoundly and roll your shoulders back, lifting your chest toward the ceiling. Gently allow your head to drop back while keeping your gaze forward.
- To increase the intensity, gradually walk your hands back toward your heels (keeping the tops of your feet on the floor) and push your hips forward. If reaching the feet is challenging, place your hands on a set of blocks positioned at the outside of your ankles.
- As you breathe deeply, continue to push your hips forward and elongate through your lower back. Hold this position for 30 seconds.
- To exit the pose, bring your hands back to your hips, slowly guide your hips toward your feet, and sit upright for a moment, allowing any sensations to diminish before transitioning to another posture.
Conclusion:
Loosen your hips so you can move freely without feeling any pain or ache in your body with the help of these basic yoga poses and stretches. Follow the tips, and we surely hope you live to be physically fit and have lived a healthy lifestyle.

